Settings for playing a draw: complete guide to setup, grip, and ball position
The settings for playing a draw rely on three combined factors: body alignment slightly to the right of the target, a clubface only slightly closed relative to the ball path, and a ball position adapted to the club being used. When properly balanced, these three adjustments produce a trajectory that starts to the right and naturally returns to the target, without hand intervention.
Looking to produce a reliable draw without tweaking your swing every round? This article locks down, setting by setting, everything you need to adjust before even thinking about the swing: setup, grip, ball position, club path, and impact angle.
For an overview of the trajectory itself, first consult our A complete guide to playing draw.
Expert advice: Change only one setting at a time during a set of shots (path OR face OR grip). Mixing multiple adjustments makes diagnosis impossible on the Belvédère Golf driving range.
Table of Contents - Settings for playing a draw: complete guide to setup, grip, and ball position
What your settings for playing draw should produce
A draw is created by two elements working together: a club path oriented from the inside out, and a clubface slightly closed relative to that path—but not necessarily closed relative to the target itself. This nuance distinguishes a true draw from a hooked shot.
- Ball departure : slightly to the right of the target (for a right-handed person).
- Curvature : progressive, the ball returns towards the target line.
- Objective : a moderate and repeatable curve, never a sharp turn.
If your ball starts to the left and turns even further to the left, it's probably not a draw but a hook — the distinction is worth making before correcting anything:
How to align your body for a draw?
Alignment for a draw boils down to a simple rule: the body slightly to the right of the target, the clubface closer to the target than the body line. This gap between the two "rails" naturally encourages an inside-out swing path, without hand manipulation.
- Feet, hips, shoulders : oriented a few degrees to the right of the final target — a moderate deviation, not a massive blockage.
- Club face : aligned closer to the target than your foot line.
- Glance : first fixed on a starting point on the right, then transferred to the target.
A simple way to visualize this double alignment: place one club on the ground facing the target (face rail), then place a second club parallel to it, slightly offset to the right (body rail). The gap between the two should remain minimal. To delve deeper into this specific point, see our article. Alignment and grip for playing a draw details the "two rails" method with dedicated exercises.
The most common alignment error
Many golfers align their body AND clubface to the right at the same time. The result is a push that never returns to the target, rather than a draw. To create a true draw, the body and clubface must play different roles—it's this controlled separation, not the overall orientation, that produces the curve.
What ball position is best for a draw?
Ball position directly influences your swing low point and the timing of face closure at impact. A ball too far forward in your stance promotes wrist flip and therefore a hook; a ball too far back sometimes locks the face and prevents the curve from occurring.
| Club | Recommended ball position |
|---|---|
| Medium irons | Slightly in front of the center of the stance |
| Fairway woods / hybrids | A little further forward than for the irons |
| Driver | Close to the front heel, without being excessive |
With the driver, this adjustment becomes even more crucial because the ball is on the tee and the higher club speed amplifies every deviation in position.
Our dedicated article Draw off the driver: setup, swing and mistakes to avoid details precisely this adjustment with the club in hand.
What grip should I use to play a draw?
The draw grip isn't about grip strength, but about hand positioning to facilitate a progressive and stable clubface closure at impact. The goal: to see two to three knuckles of the left hand at address (for a right-handed golfer), without going overboard.
- Grip too weak : the face remains open at impact → balls that go to the right and do not come back (push, slice).
- Neutral to slightly reinforced grip : facilitates a face that closes naturally at the right time → controlled draw.
- Grip too strong : early face closure → high risk of hook, especially combined with excessive hand relaxation.
Once the grip is stable, the right hand should follow the movement without "pushing" to artificially create the effect. This pushing is one of the most frequent causes of inconsistent contact and an unstable face—the movement should remain a consequence of the body's rotation, not an isolated action of the hands.
How to build the indoor-outdoor club pathway?
Once the alignment, ball position, and grip are in place, the next adjustment concerns the swing path itself. An inside-out swing path means that at impact, the clubhead moves slightly to the right of the target—a subtle movement, not visible to the naked eye, but crucial for the curve.
- Exterior-interior path → fade or slice.
- Neutral path with square facing → straight ball.
- Indoor-outdoor path with correctly oriented face → draw.
This path is not created by "throwing" the club inwards on the downswing: it is built by the natural sequence of the body — the hips initiate the movement, the torso follows, the arms return in front of the body rather than outside.
To work specifically on this sensation, see Indoor-outdoor path: the basis of the draw.
Club face: the dosage that makes all the difference
The final, and arguably most delicate, adjustment concerns the clubface angle at impact. A draw doesn't require an excessively closed, "slammed" face; it needs a face that is slightly closed relative to the club path, with centered contact.
A numerical example illustrates this balance: if your club path is oriented 4° to the right of the target, a clubface 1° to the right (closer to the target than the path, but still slightly open relative to it) produces a slightly rightward launch followed by a leftward curve—exactly the desired pattern. If the clubface moves to the left of the target while the path remains to the right, the risk of a hook increases significantly.
Quickly diagnose your result
- The ball goes to the right and doesn't come back. → face too open in relation to the target.
- The ball immediately goes to the left. → face already too closed, or path too oriented to the left.
- The ball starts to the left and then turns even further to the left. → face too closed in relation to the path, often combined with excessive relaxation of the hands.
Three exercises to solidify these settings for playing a draw on the practice range
Once the settings are understood, repetition on the practice range will turn them into reflexes. Three exercises each target one of the levers mentioned above.
Double line drill (alignment and ball start). Place one club on the ground pointing towards the target, then place a second club parallel to it, slightly offset to the right. Aim with your body on the offset line and the clubface closer to the target. The goal: to strike the ball within the opening created by the gap between the two clubs.
Drill «door» (interior-exterior path). Place two tees forming a narrow gate just in front of the ball. The club should pass through the gate without touching the tees, coming from slightly inside. Touching the outside tee indicates a path that is still too outside-in.
Drill «controlled finish» (stable face). Swings at 70° % speed, maintaining a balanced finish, chest facing the target. The goal is not power but repeatability: aim for 7 out of 10 balls to return smoothly towards the target before increasing speed. To extend this training with a complete progression, consult 6 exercises to play draw regularly.
When to use a draw on the course?
Beyond practice, these adjustments become truly meaningful in specific game situations. A draw becomes a strategic tool when:
- The hole turns to the left (left dogleg): the curve of the draw naturally follows the shape of the fairway.
- The wind is blowing from the right : the lower and penetrating trajectory of the draw resists the effects of crosswinds better than a high ball.
- There is an obstacle on the right. : a start slightly to the right followed by a return towards the target allows you to go around it without aiming directly in its direction.
- You are looking for distance from the driver : a controlled draw generally generates a lower launch angle and more ground roll than a fade, provided you stay within a moderate curve.
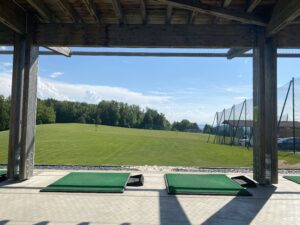
Expert advice: On the covered practice area of Golf du Belvédère, the best way to validate these settings before taking them to the course is to work with clear visual references and measure its dispersion over several consecutive balls, rather than judging a single isolated shot.
The 5 mistakes that ruin your settings
- Alignment too far to the right combined with a face that is too closed : the risk of hooking increases sharply.
- Excessively reinforced grip : premature and uncontrolled closure of the face.
- Ball position too far forward : unstable timing, tendency to flip the wrists.
- Seeking the effect rather than the path : random curvature, unpredictable result from one shot to the next.
- Right hand that "pushes" to create the effect : irregular contact, unstable face upon impact.
Changing multiple settings at once during the same set of balls makes diagnosis impossible: it is better to isolate a single focus (path, face or grip) per training set to precisely identify what works.
Quick checklist: your settings for playing draw in 30 seconds
Before a tee shot or an important shot on the course, this checklist allows you to revalidate the essentials without having to "fix" the swing in the middle of the game.
- Alignment : body slightly to the right of the target.
- Club face : slightly closed in relation to the path, never slammed shut.
- Ball position : consistent with the club used.
- Grip : stable, 2 to 3 phalanges visible on the left hand side.
- Intention : start to the right, natural return towards the target.
Conclusion: simple adjustments, applied one by one
Adjusting your swing for a draw doesn't require redoing it: it relies on body alignment, ball position, and grip that are fine-tuned beforehand, combined with a club path and face shape gradually refined on the practice range. This controlled ball movement, long documented in golf mechanics... golf swing, remains primarily a matter of repetition rather than seeking effect.
Want personalized feedback on these settings, tested directly on a real 9-hole course that same day?’Belvedere Golf School offers courses adapted to all levels, in Saint-Martin-Bellevue near Annecy.
FAQ: Settings for playing a draw: complete guide to setup, grip, and ball position
Do you need a closed stance to play a draw?
No, it's not the stance alone that creates the draw, but the difference between the body's orientation and that of the clubface. A neutral or even slightly open stance can produce a draw if the shoulders remain oriented to the right and the clubface stays closer to the target.
Can a left-handed person play a draw as easily as a right-handed person?
Yes, the same settings apply when mirroring. It's sometimes perceived as more difficult because the natural swing of many left-handed players tends towards a fade, but structured work on the path and face allows for an equally controlled draw.
Does equipment influence the ability to play a draw?
A shaft that's too flexible for the player's swing speed can close more than intended and amplify a tendency to hook. Similarly, a driver face set too closed accentuates this effect. A fitting allows these parameters to be checked in addition to swing adjustments.
How long does it take to stabilize a draw?
This varies depending on the level, but regularity trumps intensity: two short, targeted sessions per week, with only one setting worked on at a time, generally give faster results than one long, unstructured session.
Is it safe to play a draw in competition?
Yes, provided the curve remains moderate and has been tested beforehand on the practice range. An uncontrolled draw in real playing conditions, with the pressure of the score, tends to turn into a hook — hence the importance of validating your settings before the competition.
What is the difference between the settings for a draw and for a fade?
The two logics are reversed: for a fade, the body aligns slightly to the left of the target and the face remains closer to the target than the body line, whereas for a draw it's the opposite. See our article Difference between draw and fade for full details.